READ THIS BEFORE CONTINUE
#
#*******************************************************************************
# RASPBERRY PI 2 MODEL B ON DEBIAN STRETCH 9.6
#*******************************************************************************
#
# /etc/os-release
#
root@raspime:~# cat /etc/os-release
PRETTY_NAME="Raspbian GNU/Linux 9 (stretch)"
NAME="Raspbian GNU/Linux"
VERSION_ID="9"
VERSION="9 (stretch)"
ID=raspbian
ID_LIKE=debian
HOME_URL="http://www.raspbian.org/"
SUPPORT_URL="http://www.raspbian.org/RaspbianForums"
BUG_REPORT_URL="http://www.raspbian.org/RaspbianBugs"
Instal needed package using this command
root@raspime:~# apt-get install udisks-glue policykit-1 supervisor
#
#*******************************************************************************
# MINIDLNA CONFIGURATION
#*******************************************************************************
#
# /etc/minidlna.conf
#
root@raspime:~# cat /etc/minidlna.conf

media_dir=V,/media/minidlna/MOVIES
media_dir=A,/media/minidlna/MUSICS
media_dir=P,/media/minidlna/PICTURES

friendly_name=Raspime Media Server
inotify=yes
notify_interval=30
db_dir=/var/cache/minidlna
log_dir=/var/log
log_level=warn
Check minidlna version
root@raspime:~# apt show minidlna

Package: minidlna
Version: 1.2.1-1
Status: install ok installed
Priority: extra
Section: checkinstall
Maintainer: diantokam@raspime
Installed-Size: 598 kB
Provides: minidlna
Download-Size: unknown
APT-Manual-Installed: yes
APT-Sources: /var/lib/dpkg/status
Description: MiniDLNA Version 1.2.1 Compiled December 4, 2018
Compiled for Debian 9.6 by  diantokam.blogspot.com


root@raspime:~# minidlnad -V

Version 1.2.1

#
# /etc/init.d/minidlna status
#
root@raspime:~# /etc/init.d/minidlna status

minidlna.service - LSB: minidlna server
Loaded: loaded (/etc/init.d/minidlna; generated; vendor preset: enabled)
Active: active (exited) since Thu 2018-12-06 20:00:02 WIB; 6min ago
Docs: man:systemd-sysv-generator(8)
Process: 7385 ExecStop=/etc/init.d/minidlna stop (code=exited, status=0/SUCCESS)
Process: 7395 ExecStart=/etc/init.d/minidlna start (code=exited, status=0/SUCCESS)

Dec 06 20:00:02 raspime systemd[1]: Started LSB: minidlna server.
#*******************************************************************************
# SUPERVISOR
#*******************************************************************************
root@raspime:~# cat /etc/supervisor/conf.d/minidlna_scanmedia.conf
[program:minidlna_scanmedia]
command=/usr/local/bin/minidlna_scanmedia.sh
autostart=true
autorestart=true
stdout_logfile=/var/log/supervisor/minidlna_scanmedia-out.log
stderr_logfile=/var/log/supervisor/minidlna_scanmedia-err.log
root@raspime:~# /etc/init.d/supervisor restart
[ ok ] Restarting supervisor (via systemctl): supervisor.service.
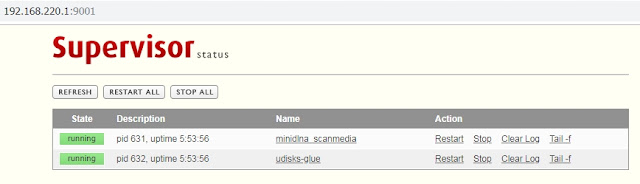
root@raspime:~# supervisorctl
minidlna_scanmedia RUNNING pid 10259, uptime 0:01:45
udisks-glue RUNNING pid 10260, uptime 0:01:45
supervisor>
* Type quit for quit
#*******************************************************************************
# MINIDLNA_SCANMEDIA.SH
#*******************************************************************************
#
# /usr/local/bin/minidlna_scanmedia.sh
#
root@raspime:~# cat /usr/local/bin/minidlna_scanmedia.sh

#!/bin/bash
# Created by diantokam.blogspot.com
# December 8, 2018
# This script will runing continuous to check if any
# flashdisk mounted on /media/ by checking log from
# udisk-glue fromsupervisord


while :
do
cat /var/log/supervisor/udisks-glue-out.log | grep -v "BOOTLOADER" | grep media | grep Successfully
cat /var/log/supervisor/udisks-glue-out.log | grep media | grep Successfully
        if [ $? -eq 0 ]
                then
                echo `date`
                echo "mounted media successfully and minidlna will force-reload"
                sleep 10

                service minidlna force-reload
                sleep 5
                echo "" >/var/log/supervisor/udisks-glue-out.log
                break
        fi
                #echo "scan terus gan"
sleep 3
done
WHEN USB FLASHDISK INSERTED AND MOUNTED BY UDISK-GLUE
Supervisord continously run minidlna_scanmedia.sh until it recognize there is usb disk mounted on /media/SLAX9.4, it will run "service minidlna force-reload" and then clear "/var/log/supervisor/udisks-glue-out.log" so it becomes empty
#*******************************************************************************
#ACTION !
#*******************************************************************************
root@raspime:~# mount | grep media

/dev/sdb1 on /media/SLAX9.4 type fuseblk (rw,nosuid,nodev,noatime,sync,user_id=0,group_id=0,default_permissions,allow_other,blksize=4096,uhelper=udisks)


root@raspime:~# cat /var/log/supervisor/minidlna_scanmedia-out.log

Successfully automounted /dev/sdb1 at /media/SLAX9.4
Thu 6 Dec 20:31:43 WIB 2018
mounted media successfully and minidlna will force-reload
The script will then clear udisks-glue-out log
root@raspime:~# cat /var/log/supervisor/udisks-glue-out.log
** EMPTY **