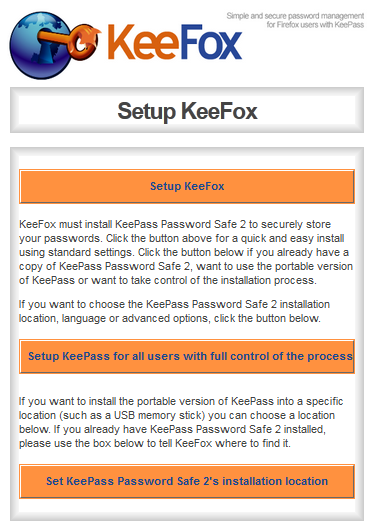
2. Download KeePass2Android Password Safe from here
Instalation :
1. Just click install on it.

# wget http://gdlp01.c-wss.com/gds/6/0100004596/01/Linux_CAPT_PrinterDriver_V250_uk_EN.tar.gzExtract it
# tar -zxvf Linux_CAPT_PrinterDriver_V250_uk_EN.tar.gz
Linux_CAPT_PrinterDriver_V250_uk_EN/
Linux_CAPT_PrinterDriver_V250_uk_EN/32-bit_Driver/
Linux_CAPT_PrinterDriver_V250_uk_EN/32-bit_Driver/Debian/
Linux_CAPT_PrinterDriver_V250_uk_EN/32-bit_Driver/Debian/cndrvcups-capt_2.50-1_i386.deb
Linux_CAPT_PrinterDriver_V250_uk_EN/32-bit_Driver/Debian/cndrvcups-common_2.50-1_i386.deb
Linux_CAPT_PrinterDriver_V250_uk_EN/32-bit_Driver/RPM/
Linux_CAPT_PrinterDriver_V250_uk_EN/32-bit_Driver/RPM/cndrvcups-capt-2.50-1.i386.rpm
Linux_CAPT_PrinterDriver_V250_uk_EN/32-bit_Driver/RPM/cndrvcups-common-2.50-1.i386.rpm
Linux_CAPT_PrinterDriver_V250_uk_EN/64-bit_Driver/
Linux_CAPT_PrinterDriver_V250_uk_EN/64-bit_Driver/RPM/
Linux_CAPT_PrinterDriver_V250_uk_EN/64-bit_Driver/RPM/cndrvcups-capt-2.50-1.x86_64.rpm
Linux_CAPT_PrinterDriver_V250_uk_EN/64-bit_Driver/RPM/cndrvcups-common-2.50-1.x86_64.rpm
Linux_CAPT_PrinterDriver_V250_uk_EN/Doc/
Linux_CAPT_PrinterDriver_V250_uk_EN/Doc/guide-capt-2.5xUK.tar.gz
Linux_CAPT_PrinterDriver_V250_uk_EN/Doc/LICENSE-captdrv-2.50E.txt
Linux_CAPT_PrinterDriver_V250_uk_EN/Doc/README-capt-2.5xUK.txt
Linux_CAPT_PrinterDriver_V250_uk_EN/Src/
Linux_CAPT_PrinterDriver_V250_uk_EN/Src/cndrvcups-capt-2.50-1.tar.gz
Linux_CAPT_PrinterDriver_V250_uk_EN/Src/cndrvcups-common-2.50-1.tar.gz
Install only 2 files
# rpm -Uvh Linux_CAPT_PrinterDriver_V250_uk_EN/32-bit_Driver/RPM/cndrvcups-common-2.50-1.i386.rpm

# rpm -Uvh Linux_CAPT_PrinterDriver_V250_uk_EN/32-bit_Driver/RPM/cndrvcups-capt-2.50-1.i386.rpm
Restart the cups
/etc/init.d/cups restart
Now run this command
# /usr/sbin/lpadmin -p LBP2900 -m CNCUPSLBP2900CAPTK.ppd -v ccp:/var/ccpd/fifo0 -E
# /usr/sbin/ccpdadmin -p LBP2900 -o /dev/usb/lp0
/etc/init.d/ccpd start
To see printer status
# captstatusui -P LBP2900
For Network Printer
Info Canon LBP2900 CAPT English
Location Titan
MakeModel Canon LBP2900 CAPT ver.1.5
DeviceURI smb://username:password@192.168.110.249/Canon%20LBP2900
State Idle
StateTime 1367827711
Type 8392836
Filter application/vnd.cups-raw 0 -
Filter application/vnd.cups-postscript 0 pstocapt
Filter application/vnd.cups-command 0 commandtops
Accepting Yes
Shared Yes
JobSheets none none
QuotaPeriod 0
PageLimit 0
KLimit 0
OpPolicy default
ErrorPolicy stop-printer
 | ||
| MyPrinter (GTK View) |
 |
| MyPrinter (WebView) |
tar -zxvf pdf2svg-0.2.1.tar.gzGo to extracted directory
cd pdf2svg-0.2.1Do configure
./configure --prefix=/usr/localAnd make
makein this step im not so successful, there is warning like this
pdf2svg.c:152: warning: incompatible implicit declaration of built-in function ‘free’BUT i ignore it, just try my luck :D Final step is
make installAnd check
which pdf2svggiving me result
/usr/local/bin/pdf2svgHow to use Simple enough, just follow author website example (again)
pdf2svg pdf_testpage.pdf pdf_testpage.svgnow you can open pdf_testpage.svg on inkscape with all converted fonts (Yes !!! converted) and save it as eps file to open using Adobe Illustrator.

sshpass -p yourpassword scp username@server.com:/path/to/file/singlefile .
sshpass -p yourpassword ssh username@server.com
 |
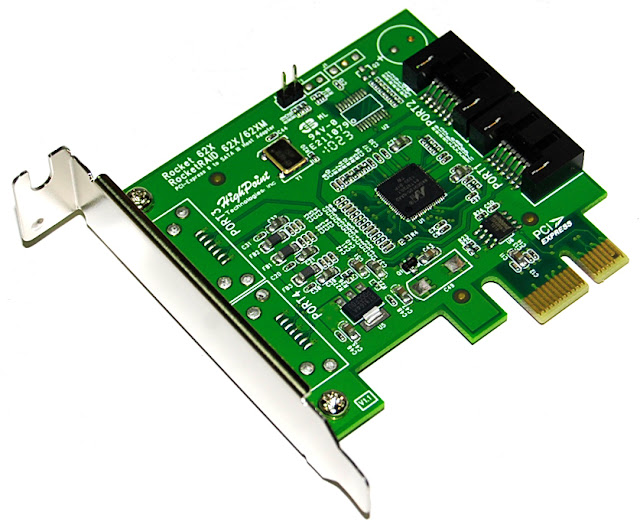
| HighPoint RocketRAID 620 - 88SE9125 SATA Controller |
cd /tmp
wget https://www.kernel.org/pub/linux/kernel/v3.x/linux-3.8.7.tar.xz
tar -xvf linux-3.8.7.tar.xz -C /usr/src/linux
rm -f /usr/src/linux
cd /usr/src
ln -s linux-3.8.7 linux
cd /tmp
wget http://ftp.slax.org/Slax-7.x-development/sources/Slax-7.0-sources/kernel/.config-i486
cp -v .config-i486 .config /usr/src/linux/.config
cd /usr/src/linux
make oldconfig
make menuconfig # if you want change something do it now, but i don't touch it and it worked for me.
make bzImage modules # compile the kernel and the modules
make modules_install # installs the modules to /lib/modules/
cp -v arch/x86/boot/bzImage /boot/vmlinuz-3.8.6-10.04.13-diantokam # copy the new kernel file
cp -v System.map /boot/System.map-3.8.6-10.04.13-diantokam # copy the System.map (optional)
cp -v .config /boot/config-3.8.6-10.04.13-diantokam # backup copy of your kernel config
cd /boot
rm -f System.map # delete the old link
ln -s System.map-3.8.6-10.04.13-diantokam System.map # create a new link
ln -s vmlinuz-3.8.6-10.04.13-diantokam vmlinuz # create a new kernel link
cd /boot
wget http://www.slackware.com/~alien/tools/mkinitrd_command_generator.sh
sh mkinitrd_command_generator.sh

#
# mkinitrd_command_generator.sh revision 1.45
#
# This script will now make a recommendation about the command to use
# in case you require an initrd image to boot a kernel that does not
# have support for your storage or root filesystem built in
# (such as the Slackware 'generic' kernels').
# A suitable 'mkinitrd' command will be:

mkinitrd -c -k 3.8.6-10.04.13-diantokam -f ext3 -r /dev/sda1 -m usbhid:uhci-hcd:ext3 -u -o /boot/initrd.gz
cd /etc/rc.d/
rm -f rc.modules
ln -s rc.modules-3.8.6-10.04.13-diantokam rc.modules
cat /boot/grub/menu.lst
timeout 10
color light-gray/red black/light-gray
title Slackware 14.0 on (/dev/sda1)
root (hd0,0)
kernel /boot/vmlinuz root=UUID=6eaf2751-c81d-48ca-b896-4d7ff530da5e ro vga=791 raid=noautodetect
initrd /boot/initrd.gz
root:# lshw -short -C disk
H/W path Device Class Description
================================================
/0/2/0.0.0 /dev/sda disk 3TB WDC WD30EZRS-00J <--SATA Controller 88SE1925 Gen2 signaling speed (3.0Gb/s)
/0/3/0.0.0 /dev/sdb disk 3TB WDC WD30EZRS-00J <--SATA Controller 88SE1925 Gen2 signaling speed (3.0Gb/s)
/0/5/0.0.0 /dev/sdc disk 3TB WDC WD30EZRS-00J <--SATA Controller 88SE1925 Gen2 signaling speed (3.0Gb/s)
/0/6/0.0.0 /dev/sdd disk 1TB WDC WD10EADS-00M <--SATA Controller 88SE1925 Gen2 signaling speed (3.0Gb/s)
/0/7/0.0.0 /dev/sde disk 80GB ST380021A <--PATA on MotherBoard
/0/8/0.0.0 /dev/sdf disk 3TB ST3000DM001-1CH1 <--SATA on MotherBoard Gen3 signaling speed (6.0Gb/s)
/0/8/0.1.0 /dev/sdg disk 3TB ST3000DM001-1CH1 <--SATA on MotherBoard Gen3 signaling speed (6.0Gb/s)
/0/9/0.0.0 /dev/sdh disk 3TB ST3000DM001-1CH1 <--SATA on MotherBoard Gen3 signaling speed (6.0Gb/s)
/0/9/0.1.0 /dev/sdi disk 3TB ST3000DM001-1CH1 <--SATA on MotherBoard Gen3 signaling speed (6.0Gb/s)
root:# cat /etc/slackware-version
Slackware 12.0.0
root:# proftpd -v
ProFTPD Version 1.3.4a
root:# proftpd -l
Compiled-in modules:
  mod_core.c
  mod_xfer.c
  mod_auth_unix.c
  mod_auth_file.c
  mod_auth.c
  mod_ls.c
  mod_log.c
  mod_site.c
  mod_delay.c
  mod_facts.c
  mod_ident.c
  mod_readme.c
  mod_ratio.c
  mod_tls.c
  mod_wrap.c
  mod_ctrls_admin.c
  mod_cap.c
  mod_ctrls.c
ServerName "FTP Server" ServerType standalone DefaultServer on DeleteAbortedStores on HiddenStores on Port 21 Umask 022 MaxInstances 10 MaxClients 8 MaxClientsPerHost 8 MaxClientsPerUser 8 MaxHostsPerUser 8 SystemLog /var/log/proftpd.log TransferLog /var/log/xferlog RequireValidShell off User nobody Group nogroup AllowOverwrite onUser bel Group users AnonRequirePassword on AllowAll User art Group users AnonRequirePassword on AllowAll
$ yum install postfixEdit your main.cf
$ mcedit /etc/postfix/main.cfand add this basic configuration (change nebula.anekarupatera.lan with your FQDN machine name.
$ genkey --days 365 nebula.anekarupatera.lan
queue_directory = /var/spool/postfix
command_directory = /usr/sbin
daemon_directory = /usr/libexec/postfix
data_directory = /var/lib/postfix
mail_owner = postfix
relay_domains =
home_mailbox = Maildir/

inet_interfaces = all
inet_protocols = all

myhostname = nebula.anekarupatera.lan
mydomain = anekarupatera.lan
myorigin = $mydomain
mydestination = $myhostname, localhost.$mydomain, localhost, $mydomain
mynetworks = 192.168.110.0/24, 127.0.0.0/8

unknown_local_recipient_reject_code = 550
alias_maps = hash:/etc/aliases
alias_database = hash:/etc/aliases
debug_peer_level = 2
debugger_command =
         PATH=/bin:/usr/bin:/usr/local/bin:/usr/X11R6/bin
         ddd $daemon_directory/$process_name $process_id & sleep 5
sendmail_path = /usr/sbin/sendmail.postfix
newaliases_path = /usr/bin/newaliases.postfix
mailq_path = /usr/bin/mailq.postfix
setgid_group = postdrop
html_directory = no
manpage_directory
#
# Configuring SSL/TLS in postfix
#
broken_sasl_auth_clients = yes
smtpd_sasl_local_domain =
smtpd_sasl_auth_enable = yes
smtpd_sasl_security_options = noanonymous
smtpd_sasl_authenticated_header = yes
smtpd_recipient_restrictions = permit_sasl_authenticated,permit_mynetworks,reject_unauth_destination
#
smtpd_tls_auth_only = no
smtp_use_tls = yes
smtpd_use_tls = yes
smtp_tls_note_starttls_offer = yes
#
tls_random_source = dev:/dev/urandom
smtpd_tls_CAfile = /etc/postfix/ssl/cacert.pem
smtpd_tls_loglevel = 1
smtpd_tls_received_header = yes
smtpd_tls_session_cache_timeout = 3600s
smtpd_tls_key_file = /etc/pki/tls/private/nebula.anekarupatera.lan.key
smtpd_tls_cert_file = /etc/pki/tls/certs/nebula.anekarupatera.lan.cert
Start your postfix service
$ /etc/init.d/postfix startDovecot Instalation and Configuration
$ yum install dovecotEdit your dovecot.conf
$mcedit /etc/dovecot/dovecot.confAnd change the following line from
protocols = imap pop3 lmtpto
protocols = imap pop3Start your Dovecot service
$ /etc/init.d/dovecot start
wget https://bitbucket.org/zhb/iredmail/downloads/iRedMail-0.8.3.tar.bz2Extract download result using command below
tar -jxvf iRedMail-0.8.3.tar.bz2After extract finished, go to extract result directory
cd iRedMail-0.8.3Run iRedMail-0.8.3.sh script
$ sh iRedMail.sh
< INFO > Checking new version of iRedMail ...
< INFO > Clean metadata of yum repositories.
Loaded plugins: fastestmirror, refresh-packagekit, security
Cleaning repos: base c6-media epel extras updates
20 metadata files removed
8 sqlite files removed
0 metadata files removed
< INFO > Generating yum repository ...
< INFO > Fetching source tarballs ...
< INFO > + 1 of 6: http://iredmail.org/yum/misc/iRedAdmin-0.2.tar.bz2
< INFO > + 2 of 6: http://iredmail.org/yum/misc/roundcubemail-0.8.2.tar.gz
< INFO > + 3 of 6: http://iredmail.org/yum/misc/phpldapadmin-1.2.2.tgz
< INFO > + 4 of 6: http://iredmail.org/yum/misc/phpMyAdmin-3.5.3-all-languages.tar.bz2
< INFO > + 5 of 6: http://iredmail.org/yum/misc/iRedAPD-1.3.8.tar.bz2
< INFO > + 6 of 6: http://iredmail.org/yum/misc/phpPgAdmin-5.0.4.tar.bz2
< INFO > Validate packages ... [ OK ]
< INFO > Install package: dialog
< INFO > Installing package(s): dialog
Loaded plugins: fastestmirror, refresh-packagekit, security
Loading mirror speeds from cached hostfile
.....
...
Complete!


********************************************************************
* Start iRedMail Configurations
********************************************************************
< INFO > Create SSL certification files.
< INFO > Create required system accounts: vmail, iredapd, iredadmin.
< INFO > Configure Apache web server and PHP.
< INFO > Configure PostgreSQL database server.
< INFO > Configure Postfix (Message Transfer Agent).
< INFO > Configure Policyd (postfix policy server, code name cluebringer).
< INFO > Configure Dovecot (pop3/imap/managesieve server, version 2).
< INFO > Configure ClamAV (anti-virus toolkit).
< INFO > Configure Amavisd-new (interface between MTA and content checkers).
< INFO > Configure SpamAssassin (content-based spam filter).
< INFO > Configure iRedAPD (postfix policy daemon).
< INFO > Configure iRedAdmin (official web-based admin panel).
< INFO > Configure Fail2ban (authentication failure monitor).
< INFO > Configure Awstats (logfile analyzer for mail and web server).
< INFO > Configure Roundcube webmail.
< INFO > Configure phpPgAdmin (web-based PostgreSQL management tool).

*************************************************************************
* iRedMail-0.8.3 installation and configuration complete.
*************************************************************************

< INFO > Disable SELinux in /etc/selinux/config.
< Question > Would you like to use firewall rules provided by iRedMail now?
< Question > File: /etc/sysconfig/iptables, with SSHD port: 22. [Y|n] n
and then iRedMail will try to update your ClamAv Database, after installation finish, you will get this notification.
********************************************************************
* URLs of installed web applications:
*
* - Webmail: httpS://merkurius.anekarupatera.lan/mail/
* - Admin Panel (iRedAdmin): httpS://merkurius.anekarupatera.lan/iredadmin/
*   + Username: postmaster@anekarupatera.lan, Password: ********
*

********************************************************************
* Congratulations, mail server setup complete. Please refer to tip
* file for more information:
*
*   - /tmp/iRedMail-0.8.3/iRedMail.tips
*
* And it's sent to your mail account postmaster@anekarupatera.lan.
*
* Please reboot your system to enable mail services.
*
********************************************************************
Important, first you must read the /tmp/iRedMail-0.8.3/iRedMail.tips, on the first installation I've not read it at all, but after got some trouble i came back to read it :D
$ cat /tmp/iRedMail-0.8.3/iRedMail.tipsFinish ??? Not Yet We must update bind configuration with Domain Keys Indentified Main (DKIM), now open your console again.
$ amavisd show keysOr, if the above command complain about config file, "Config file "/etc/amavisd.conf" does not exist, at /usr/sbin/amavisd line 1799." you can use command below.
$ amavisd -c /etc/amavisd/amavisd.conf showkeysIn my case, the output loook like this
$ amavisd -c /etc/amavisd/amavisd.conf showkeys
; key#1, domain anekarupatera.lan, /var/lib/dkim/anekarupatera.lan.pem
dkim._domainkey.anekarupatera.lan. 3600 TXT (
  "v=DKIM1; p="
  "MIGfMA0GCSqGSIb3DQEBAQUAA4GNADCBiQKBgQCkfeQwd0g+DmQf4PE0vwtO3sJV"
  "pGgLrq1g5Uw0/erPxL8DGj2IdviHQuA364CpOvB4jA4h9U/fJiGBsWNA0SjnLTjV"
  "yLM4iNOSCPISJKnnvcnG6vv4UXDjwYoDJd5JYNbW2tURNMDQeWNdfQ4thLygtPH8"
  "3hkpL1b9EV5Xf9ldAwIDAQAB")
Copy and paste output text to your bind configuration in ONE LINE !!!, make it like this
$ cat /var/named/anekarupatera.lan

$ORIGIN anekarupatera.lan.
$ttl 86400
@       IN      SOA     nebula.anekarupatera.lan. root.anekarupatera.lan. (
                        2009101590
                        43200
                        3600
                        1209600
                        604800 )

                IN      NS                      nebula.anekarupatera.lan.

                IN      MX      10              nebula.anekarupatera.lan.

aurora          IN      A       192.168.110.74
athena          IN      A       192.168.110.200
gaia            IN      A       192.168.110.230
chronos         IN      A       192.168.110.231
porteus         IN      A       192.168.110.232
samba           IN      A       192.168.110.253
nebula          IN      A       192.168.110.254

mail            IN      CNAME   nebula
www             IN      CNAME   nebula

dkim._domainkey.anekarupatera.lan. IN TXT "v=DKIM1; p=MIGfMA0GCSqGSIb3DQEBAQUAA4GNADCBiQKBgQCkfeQwd0g+DmQf4PE0vwtO3sJVpGgLrq1g5Uw0/erPxL8DGj2IdviHQuA364CpOvB4jA4h9U/fJiGBsWNA0SjnLTjVyLM4iNOSCPISJKnnvcnG6vv4UXDjwYoDJd5JYNbW2tURNMDQeWNdfQ4thLygtPH83hkpL1b9EV5Xf9ldAwIDAQAB"
Now test your DKIM key, it should be pass right now.
# amavisd -c /etc/amavisd/amavisd.conf testkeys
TESTING#1: dkim._domainkey.anekarupatera.lan => pass
Final check, Make sure you have /var/www/awstats/awstats.pl on /var/www/awstats/ directory, if you don't have it, you must create it using command below.
ln /usr/share/awstats/wwwroot/cgi-bin/awstats.pl /var/www/awstats/awstats.plNow reboot your linux.